

Have you ever wanted to create your own Minecraft world where your friends can build houses, explore caves, fight mobs, and survive together? You do not need to rent an expensive server or pay for a hosting service to get started.
Running a Minecraft server on your own computer gives you control over your game world, player permissions, difficulty settings, and server configuration. It is also a great way to learn practical skills such as networking, command-line tools, basic server administration, and troubleshooting.
In this guide, you will learn how to set up a local Minecraft server for both Java Edition and Bedrock Edition, connect friends on the same Wi-Fi network, configure essential settings, and troubleshoot common problems.
What You Need Before Starting
Before installing anything, you need to decide which Minecraft edition your server will support. This is important because Java and Bedrock use different server software and network protocols.
Minecraft Java Edition is the better choice if you play on a Windows, macOS, or Linux computer and want access to a large modding and plugin ecosystem. Minecraft Bedrock Edition is designed for cross-platform multiplayer between supported Bedrock devices, including Windows PCs, mobile devices, and consoles.
A standard Java server does not automatically allow Bedrock players to join, and a Bedrock server does not automatically support Java clients. Cross-play between the editions requires additional software and configuration.
For a small private server, a reasonably modern computer with 4 GB of RAM may be enough to get started, but 8 GB or more of total system memory gives you more room to run Minecraft alongside other applications. Performance depends on the number of players, world size, view distance, mods, and other programs running on your computer.
You will also need a stable network connection, a few gigabytes of free storage, and permission to install software on the computer you intend to use as the host.
Step 1: Install Minecraft Using the Official Launcher
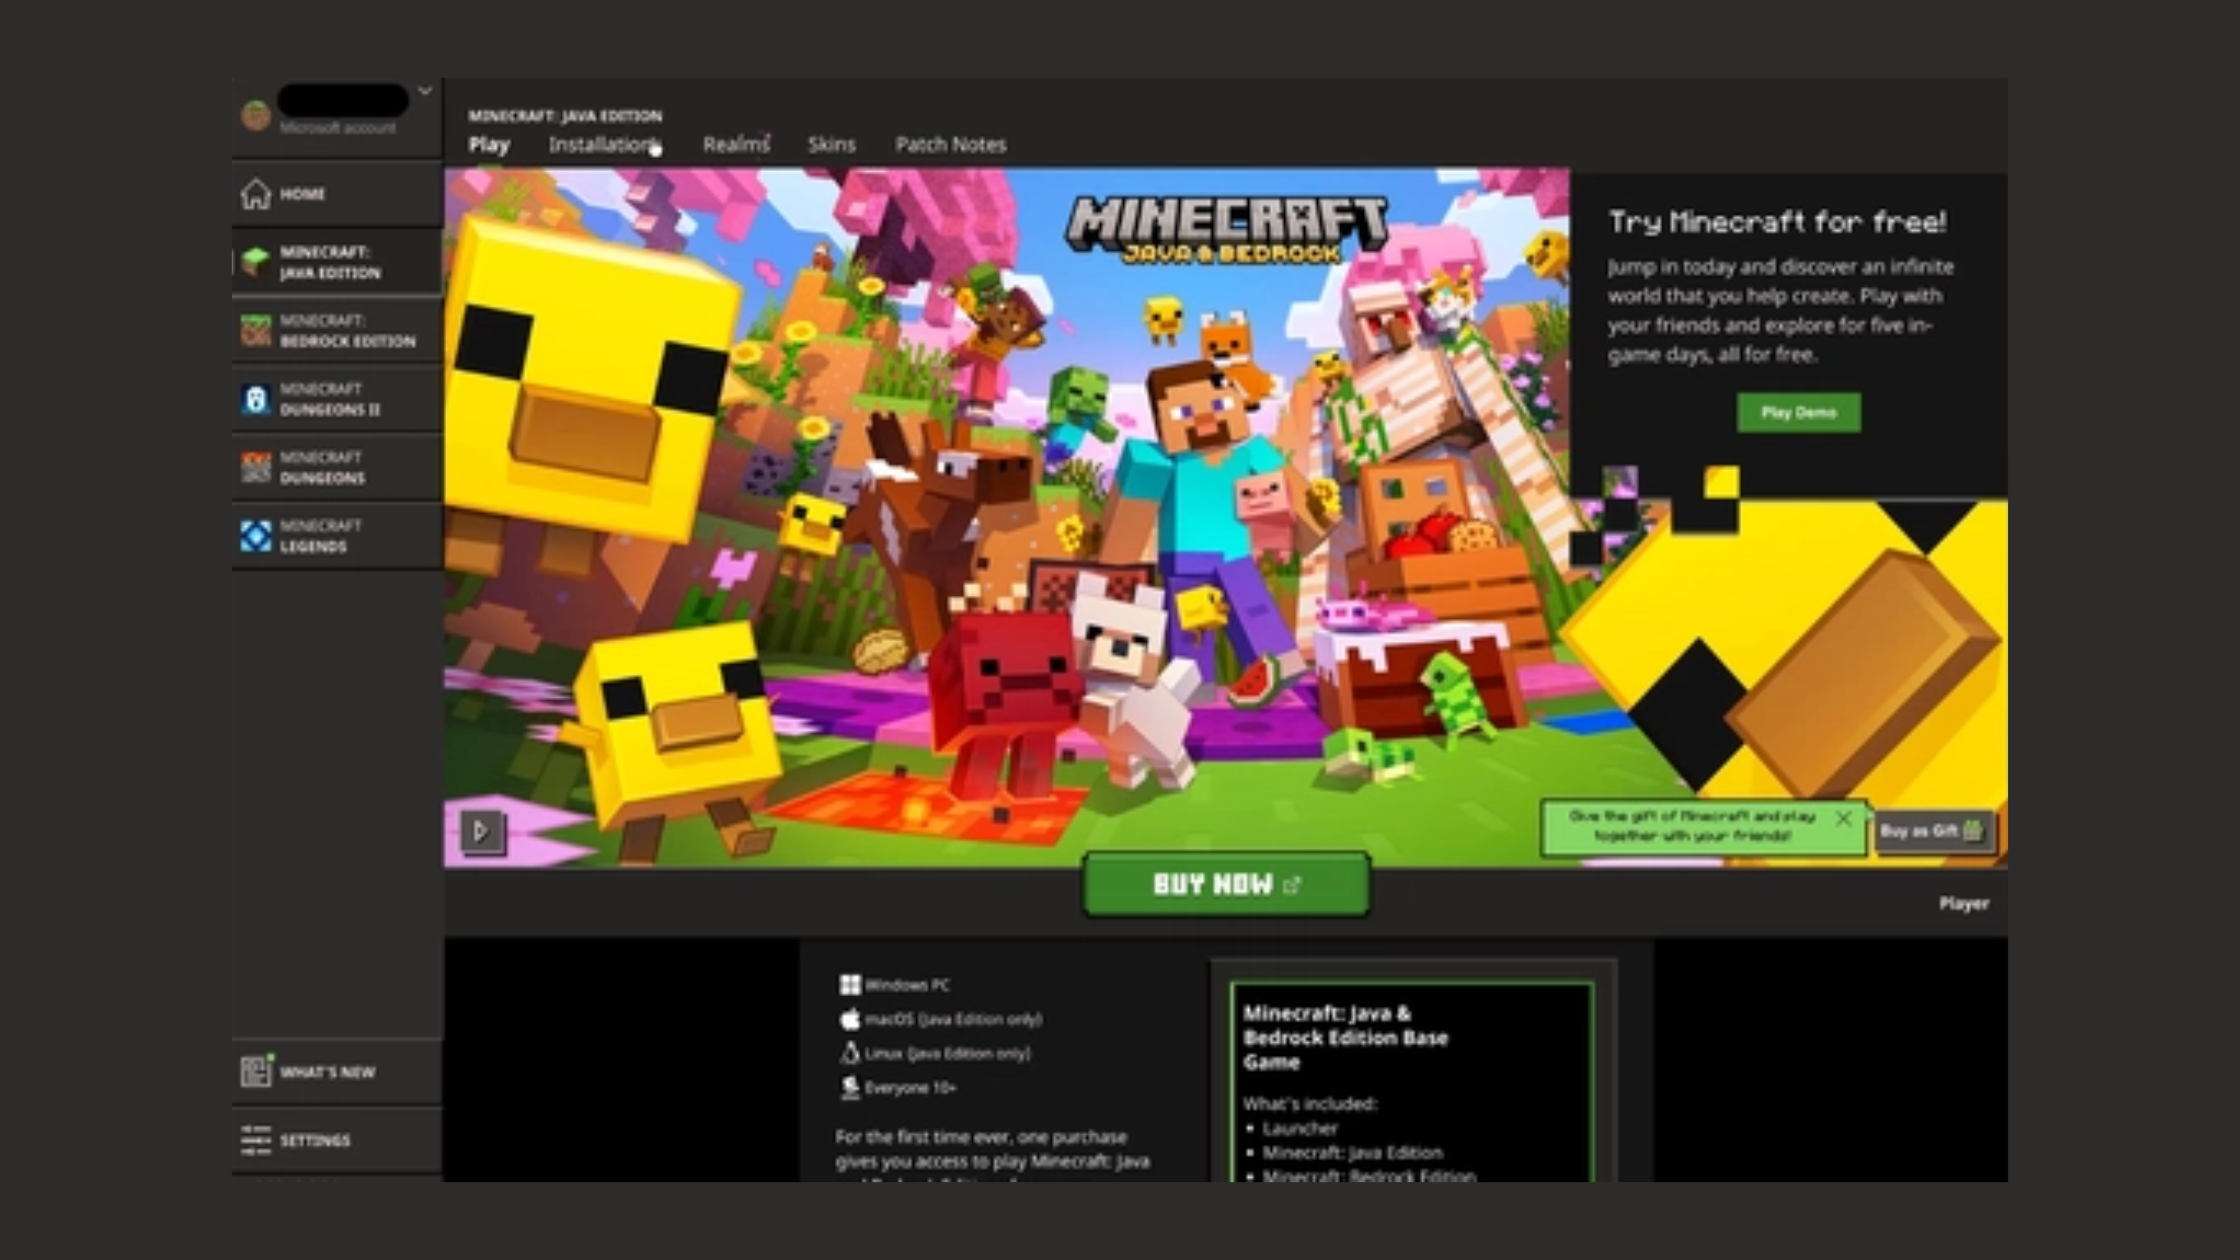
Start by downloading the official Minecraft Launcher and signing in with your Microsoft account. Make sure you own the edition you intend to play and install the appropriate game version.
Launch the game once before setting up the server. This confirms that the game files have downloaded correctly and helps you identify the edition you are using.
One important distinction: you do not need the Minecraft Launcher installed on the server computer just to run dedicated server software. The launcher is useful for installing and playing the game, while the dedicated server is a separate program. You can even host the server on a computer that you use only for hosting.
Part 1: Set Up a Minecraft Java Edition Server
Step 2: Install a Compatible Java Version
Minecraft Java Edition server software runs on Java, so you need a compatible Java runtime installed on your hosting computer.
Open Terminal on macOS or Linux, or Command Prompt or PowerShell on Windows, and run:
java -version
If Java is installed, the command will display its version. If the command is not recognized, Java may not be installed or may not be available through your system's PATH.
Do not assume that Java 17 is suitable for every Minecraft server in 2026. The required Java version depends on the Minecraft server release you download. Recent Minecraft versions may require a newer Java release. Check the official release requirements for your chosen server version and install the matching supported Java runtime.
For official server downloads and current instructions, visit the Minecraft Java Edition server download page.
Step 3: Download the Official Server File
Create a dedicated folder for your server so that the server software, world files, and configuration files stay organized.
For example, create a folder named minecraft-java-server on your Desktop. Download the official Java Edition server JAR file and move it into this folder.
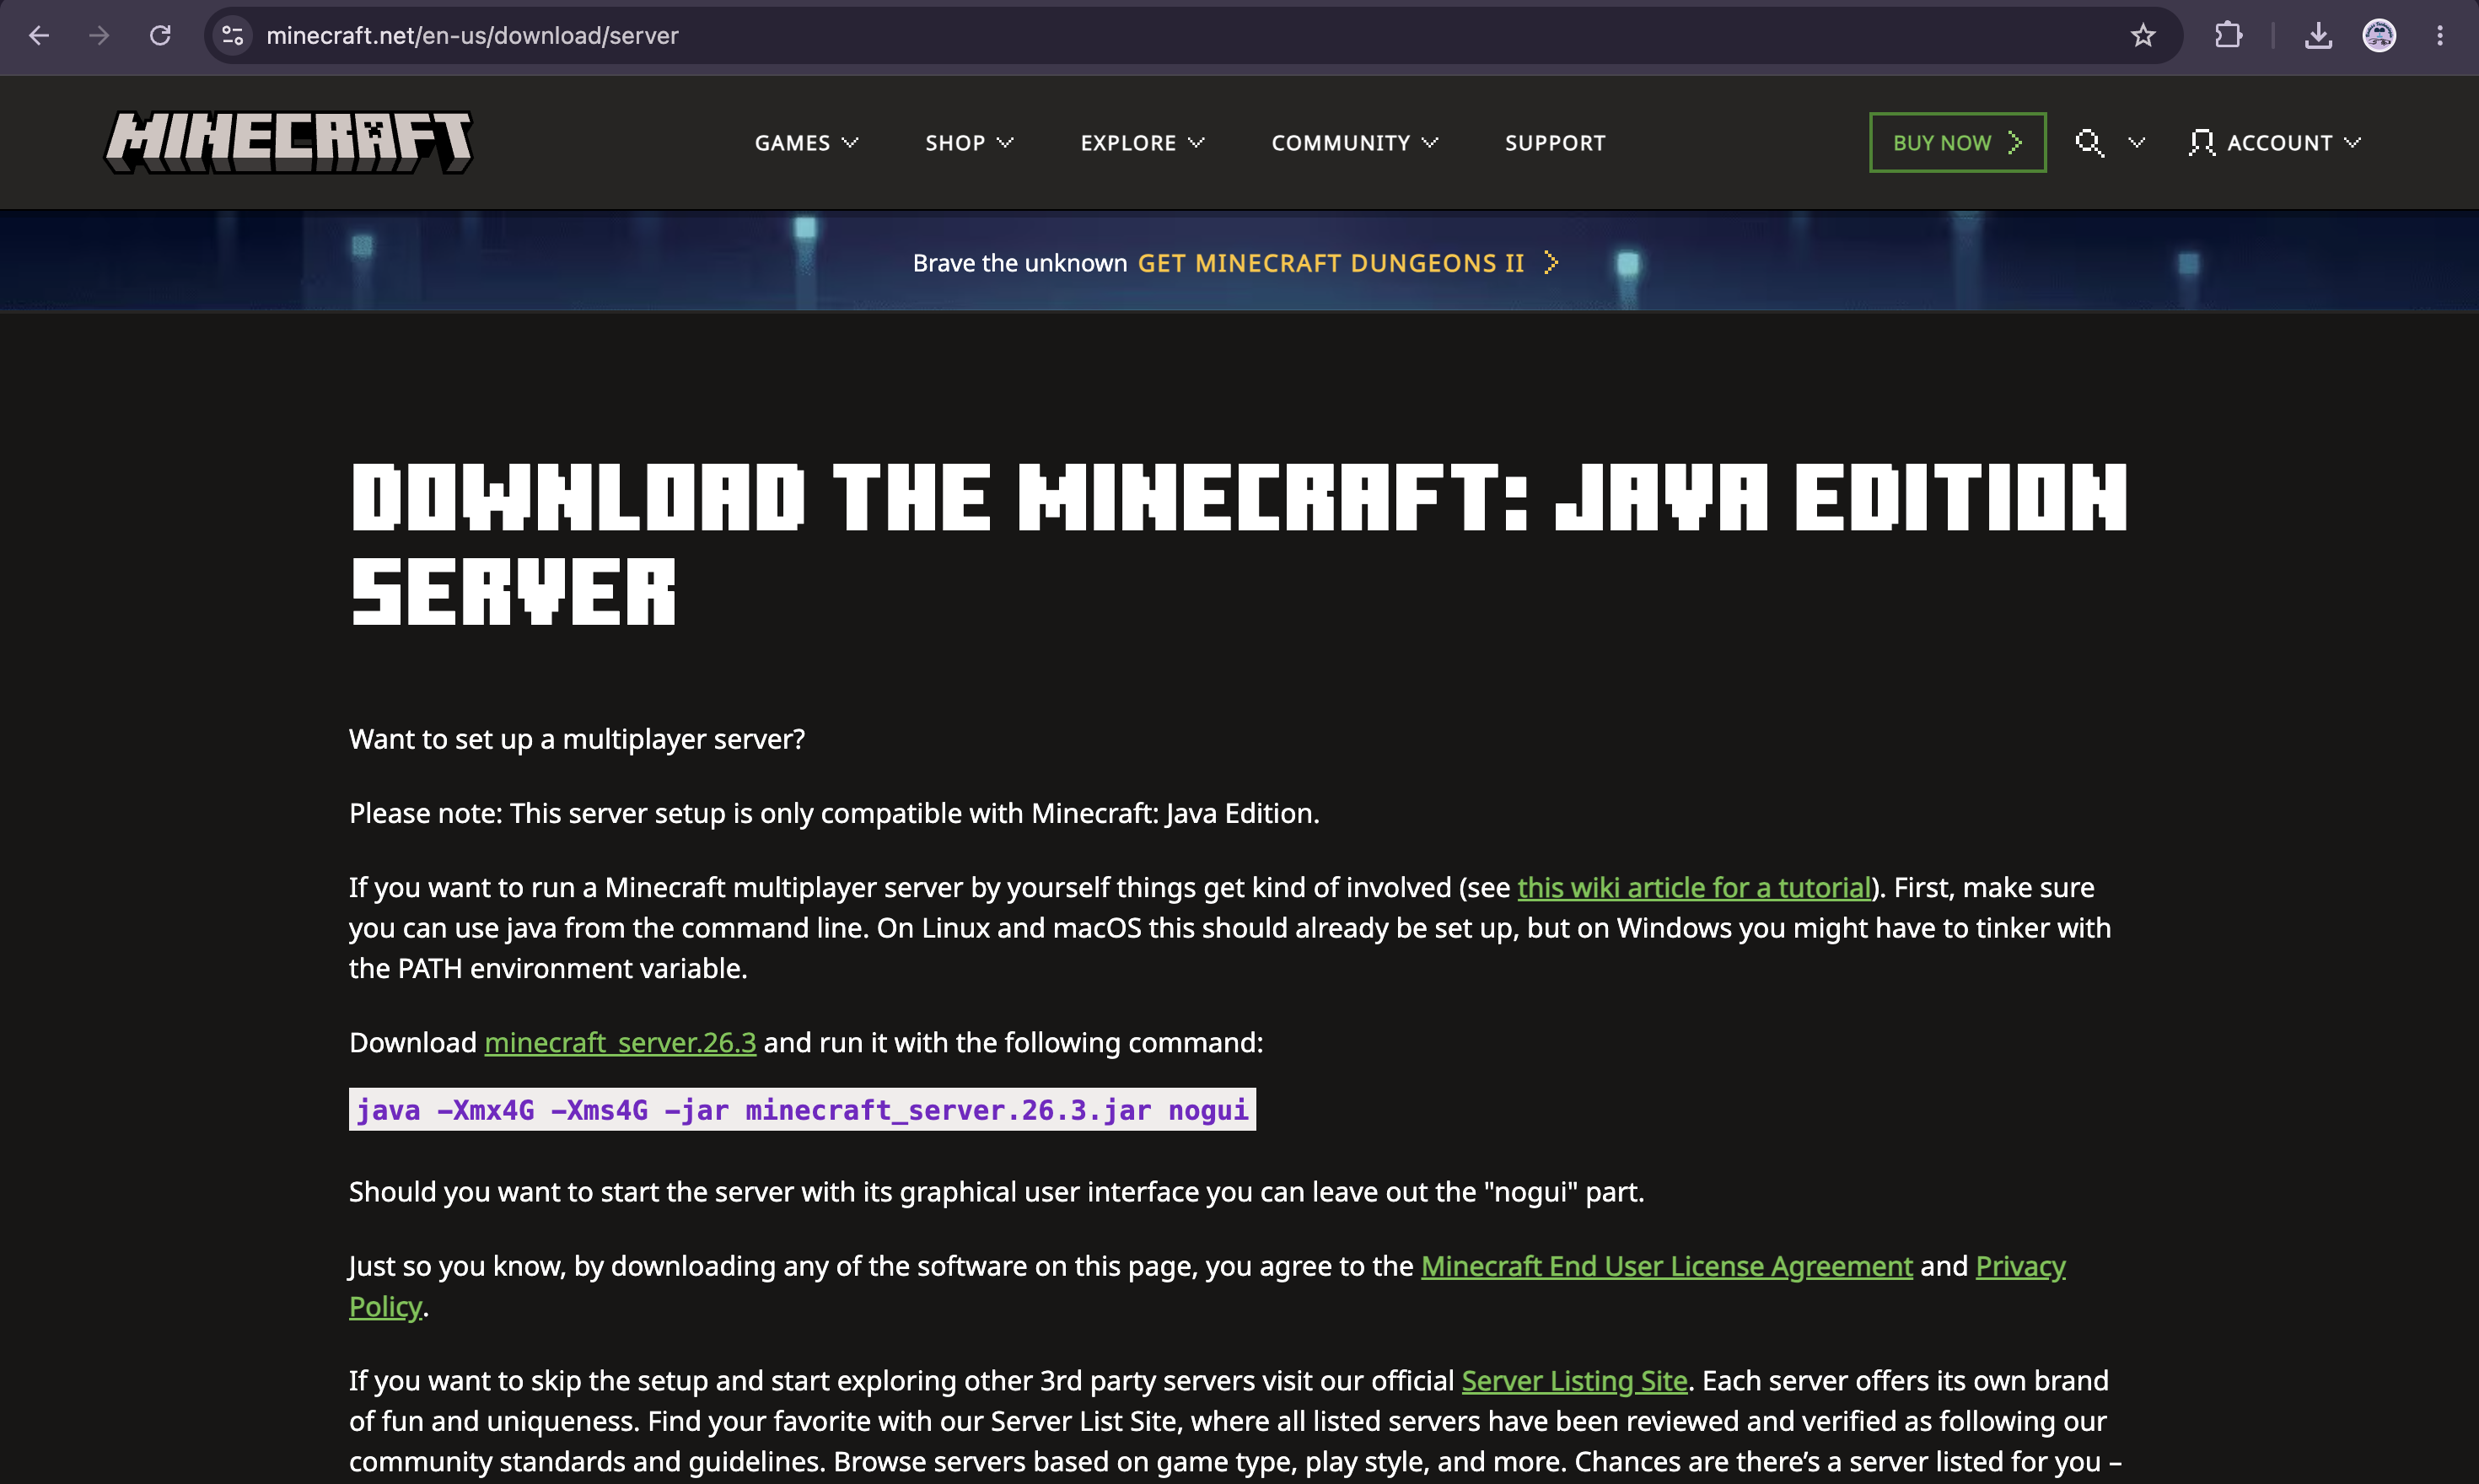
The downloaded filename contains the server version, such as minecraft_server.1.xx.x.jar. Your actual filename will depend on the version available when you download it.
For convenience, you can rename the file to server.jar, provided you keep track of which version it contains.
Your folder should look something like this:
minecraft-java-server/
└── server.jar
Use the official Minecraft website rather than an unfamiliar download site. This helps you avoid modified or potentially unsafe server files.
Step 4: Start the Server for the First Time
Open a terminal in the server folder. On Windows, you can open the folder in File Explorer, enter cmd in the address bar, and press Enter. On macOS or Linux, navigate to the folder using cd.
Run this command:
java -jar server.jar nogui
The -jar option tells Java to run the downloaded server file. The nogui option starts the server without its graphical interface, which is useful because it keeps the hosting process lightweight.
The first startup may stop after generating configuration files and reporting that you must accept the End User License Agreement. This is expected.
If you receive an error about an unsupported Java class version, check whether your installed Java version matches the requirements of the server release.
Step 5: Accept the Minecraft EULA
After the first run, look inside your server folder for a file named eula.txt.
Open it with a text editor and read the Minecraft End User License Agreement. If you agree to its terms, change:
eula=false
to:
eula=true
Save the file.
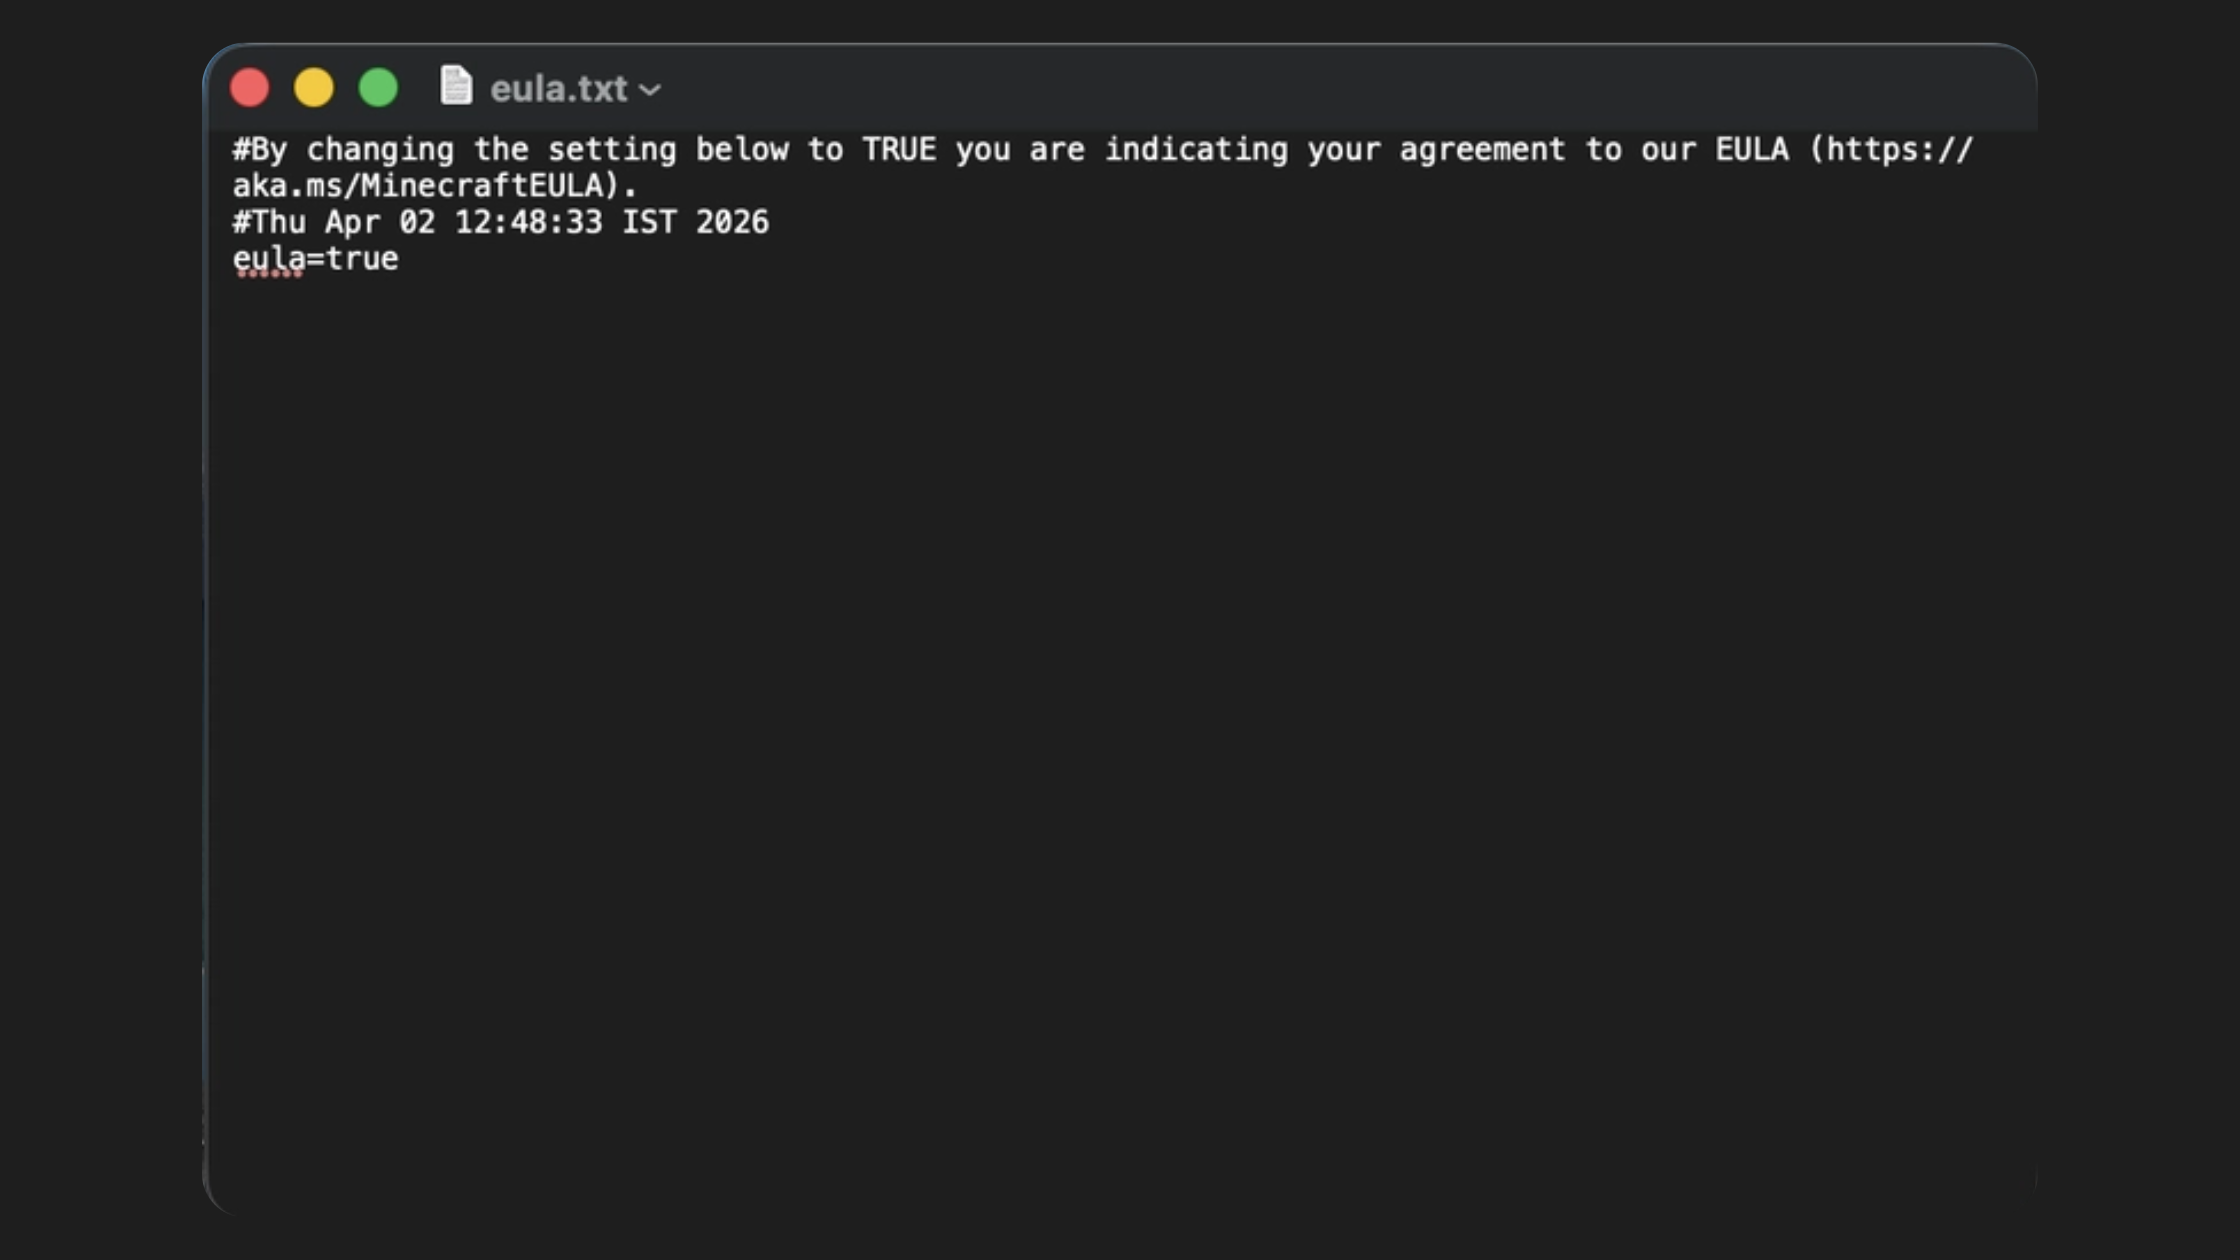
This setting records your acceptance of the agreement. Do not change it to true without reading and agreeing to the terms.
Step 6: Start the Server Again
Run the startup command again:
java -jar server.jar nogui
The server will initialize the world and generate additional files. The first launch can take longer because the world has to be created.
When the console displays a message containing Done, the server is generally ready to accept connections.
Keep the terminal window open while playing. Closing it or stopping the Java process will shut down the server.
Step 7: Join Your Own Server
Open Minecraft Java Edition using a compatible game version. From the main menu, select Multiplayer, then choose Add Server or Direct Connection.
If Minecraft is running on the same computer as the server, enter:
localhost
The address localhost refers to the computer you are currently using. It is not the address your friends should use from their own devices.
If the connection succeeds, you can begin playing in your newly created world.
Step 8: Let Friends Join Through Your Local Network
To let friends connect from another computer on the same Wi-Fi or local network, you need your hosting computer's private IP address.
On Windows, open Command Prompt and run:
ipconfig
Look for the IPv4 address associated with your active Wi-Fi or Ethernet connection. It may look like 192.168.1.25, although your network may use a different range.
On macOS, you can find your active network address in System Settings under Network, or use a suitable command in Terminal. On Linux, run:
ip addr
Once you know the hosting computer's local IP address, your friends can enter it in Minecraft. The default Java server port is 25565, so an example address would be:
192.168.1.25:25565
Replace the example IP address with your own.
If the server uses the default port, Minecraft Java Edition can often connect using just the IP address. Including the port makes the destination explicit.
Make sure the server is running and that the host computer's firewall allows incoming connections to the Java server. All players should be on the same local network, and guest Wi-Fi or router client isolation must not block communication between devices.
Part 2: Set Up a Minecraft Bedrock Edition Server
Bedrock Dedicated Server is the official server software for hosting a Bedrock world. It is a good option when you want to play with friends using supported Bedrock devices rather than Java Edition clients.
The official Bedrock Dedicated Server download is available for supported Windows and Linux systems. As of this guide, the official download page specifies Windows and Ubuntu Linux support, so do not assume that a native Bedrock dedicated server is officially supported on macOS.
Download the correct package from the official Bedrock Dedicated Server page.
Step 1: Download and Extract the Server
Create a folder named minecraft-bedrock-server. Download the server package for your operating system and extract the ZIP archive into that folder.
You should see the server executable along with configuration files and supporting files. Keep these files together because the server uses this directory to store its world and settings.
Step 2: Start the Bedrock Server
On Windows, open the folder and run bedrock_server.exe. If Windows displays a firewall prompt, allow access on your private network when appropriate.
On a supported Linux system, open a terminal in the extracted folder and run:
chmod +x bedrock_server
./bedrock_server
The chmod command makes the executable runnable if the extracted file does not already have the required permission.
The server will load its configuration and create a world if one does not already exist. Keep the process running while you play.
Step 3: Connect From Minecraft Bedrock Edition
Open Minecraft Bedrock Edition on a supported device. Go to Play, open the Servers section, and use the option to add a server if it is available on your platform.
Enter a name for the server, the local IP address of the hosting computer, and the server port.
The default Bedrock IPv4 port is:
19132
For example, if the hosting computer's local IP address is 192.168.1.25, use that address with port 19132.
The exact menus and options may differ between Windows, mobile, and console versions of Minecraft. Console networking restrictions can also affect which custom servers can be added directly.
Step 4: Allow Local Network Connections
For LAN multiplayer, connect the players and the hosting computer to the same local network. If players cannot connect, check the host firewall and make sure the router does not isolate wireless devices from one another.
Bedrock servers typically use UDP on port 19132 for IPv4, so make sure the firewall rule matches the protocol used by the server.
You do not need internet-facing port forwarding for players who are connecting only through the local network.
Part 3: Configure Your Server
Once your server is running, you can customize its world and multiplayer settings.
Both Java and Bedrock servers use a file named server.properties, but the available options and their meanings differ between editions. Always use settings supported by your specific server software.
For example, a Java Edition server may include these settings:
gamemode=survival
difficulty=normal
max-players=10
online-mode=true
motd=My Private Minecraft Server
The gamemode setting controls the default game mode, difficulty determines how challenging the world is, and max-players limits the number of simultaneous players. The motd setting defines the short server description displayed in the multiplayer list.
Keep online-mode=true on a typical Java server. This enables account authentication and is an important security setting. Disabling authentication can expose your server to impersonation and other abuse.
For a Bedrock server, check the official documentation for the equivalent supported property names and values rather than copying Java settings blindly.
Before editing the configuration file, stop the server cleanly. Make your changes, save the file, and start the server again if the setting requires a restart. Some options may only be read during startup.
Part 4: Use Your Own RAM Settings for Java
If you experience lag or the server runs out of memory, you can adjust the amount of RAM allocated to the Java process.
For example:
java -Xms1G -Xmx2G -jar server.jar nogui
Here, -Xms1G sets the initial heap size to 1 GB, while -Xmx2G sets the maximum heap size to 2 GB.
These values are examples, not universal recommendations. The right allocation depends on your computer's total RAM, the server version, the number of players, and whether you use mods or plugins. Do not allocate all your system memory to Minecraft because your operating system and other applications also need RAM.
If you run a heavily modded server, you may need more memory. If you run a small vanilla server for a few friends, you may be able to use less.
Bedrock Dedicated Server uses a different memory-management model, so these Java flags do not apply to its executable.
Part 5: Back Up Your Minecraft World
One of the easiest mistakes to make is assuming your world will always be safe just because the server runs on your own computer.
Minecraft world files can become corrupted, be deleted accidentally, or be damaged by incompatible mods and unexpected shutdowns. Before installing updates, adding plugins, or changing major configurations, make a backup.
Stop the server cleanly before copying its world folder. For Java Edition, this is usually the world directory unless you have changed the world name. For Bedrock Edition, the world is stored under the configured worlds directory.
Copy the relevant world folder to another location, such as an external drive or a separate backup directory. For a world you care about, keep multiple backups rather than relying on a single copy stored on the same disk.
You can also periodically test whether a backup can be restored. A backup is useful only if it can actually recover your world.
Part 6: Can Friends Join From Outside Your Home?
Yes, but playing over the internet is different from playing on a local network.
For LAN multiplayer, friends use your private IP address, and you generally do not need to configure your router for inbound internet connections.
For remote multiplayer, players outside your home need a reachable server address. This may require router port forwarding, appropriate firewall rules, a public IP address, and an understanding of your internet provider's network configuration.
The typical default ports are TCP 25565 for Java Edition and UDP 19132 for Bedrock Edition. Custom configurations can use different ports, and IPv6 or other networking setups may require different rules.
Be careful before opening ports on your router. Exposing a server to the internet allows external devices to attempt connections, so keep the server updated, retain authentication, limit access to trusted players, and avoid sharing your home IP address publicly.
Some internet providers use carrier-grade NAT, which can prevent ordinary inbound port forwarding from working. If that applies to your connection, you may need a suitable private networking solution or a hosting provider instead.
Do not disable your firewall entirely just to make Minecraft work. Create the narrowest appropriate rule and allow only the traffic the server needs.
Common Problems and How to Fix Them
The server closes immediately
On a Java server, check the console output for an error message. A Java version mismatch, an incorrect JAR filename, or a missing dependency can prevent startup. Verify the filename and run java -version before trying again.
Friends cannot find or join the server
First, confirm that the server is running and that you have entered the correct local IP address and port. Check that both devices are on the same network and that the host firewall allows the required traffic. Guest Wi-Fi networks and router isolation settings can block connections even when both devices appear to use the same Wi-Fi.
Connection refused
This often means the server is not listening at the address and port you entered, or a firewall is blocking the connection. Confirm that the server has finished starting and that the port in the client matches the configured server port.
The game says the versions are incompatible
The client and server generally need compatible Minecraft versions. Update the client or install the matching server release. Modded Java servers may also require specific mod-loader and mod versions on both the client and server.
The server is lagging
Server performance depends on CPU speed, memory, world generation, player activity, and network quality. Close unnecessary applications, reduce view distance if appropriate, and avoid generating large amounts of new terrain while the computer is under heavy load. Adding more RAM alone will not fix every performance problem.
Bedrock players cannot connect
Check that you downloaded the correct Bedrock server package and that the client is using Bedrock Edition. Confirm the server's IP address, UDP port, firewall permissions, and network compatibility. A Java client cannot join a standard Bedrock server without an additional cross-play solution.
What Can You Build Next?
Once your basic server works, you can turn it into a much more interesting project. Java Edition supports a wide range of server plugins, mod loaders, and custom gameplay systems. You can create protected building areas, player economies, custom game modes, and automated server management.
You can also learn to run the server as a background service, monitor logs, schedule backups, and automate updates. These are useful skills beyond Minecraft because they introduce the same concepts used in real-world application hosting and system administration.
Before installing mods or plugins, verify that they support your exact Minecraft version and server software. Back up your world first, and download add-ons only from sources you trust.
Conclusion
Setting up a Minecraft server in 2027 is a practical way to play with friends while learning how multiplayer software works behind the scenes. Java Edition offers extensive customization, while Bedrock Dedicated Server is a useful choice for supported cross-platform Bedrock play.
Start with a private LAN server, test the connection, configure the settings you need, and create a reliable backup before expanding your setup. Once everything works, you can explore mods, plugins, automation, and remote multiplayer at your own pace.
Your own Minecraft server can be more than a game world. It can be your first hands-on networking and server administration project.